")

"The most user friendly headend control software on the market"
Step 1 : Installation
Download and install DTVIFace using the button above. Unzip the download and start the installation file.
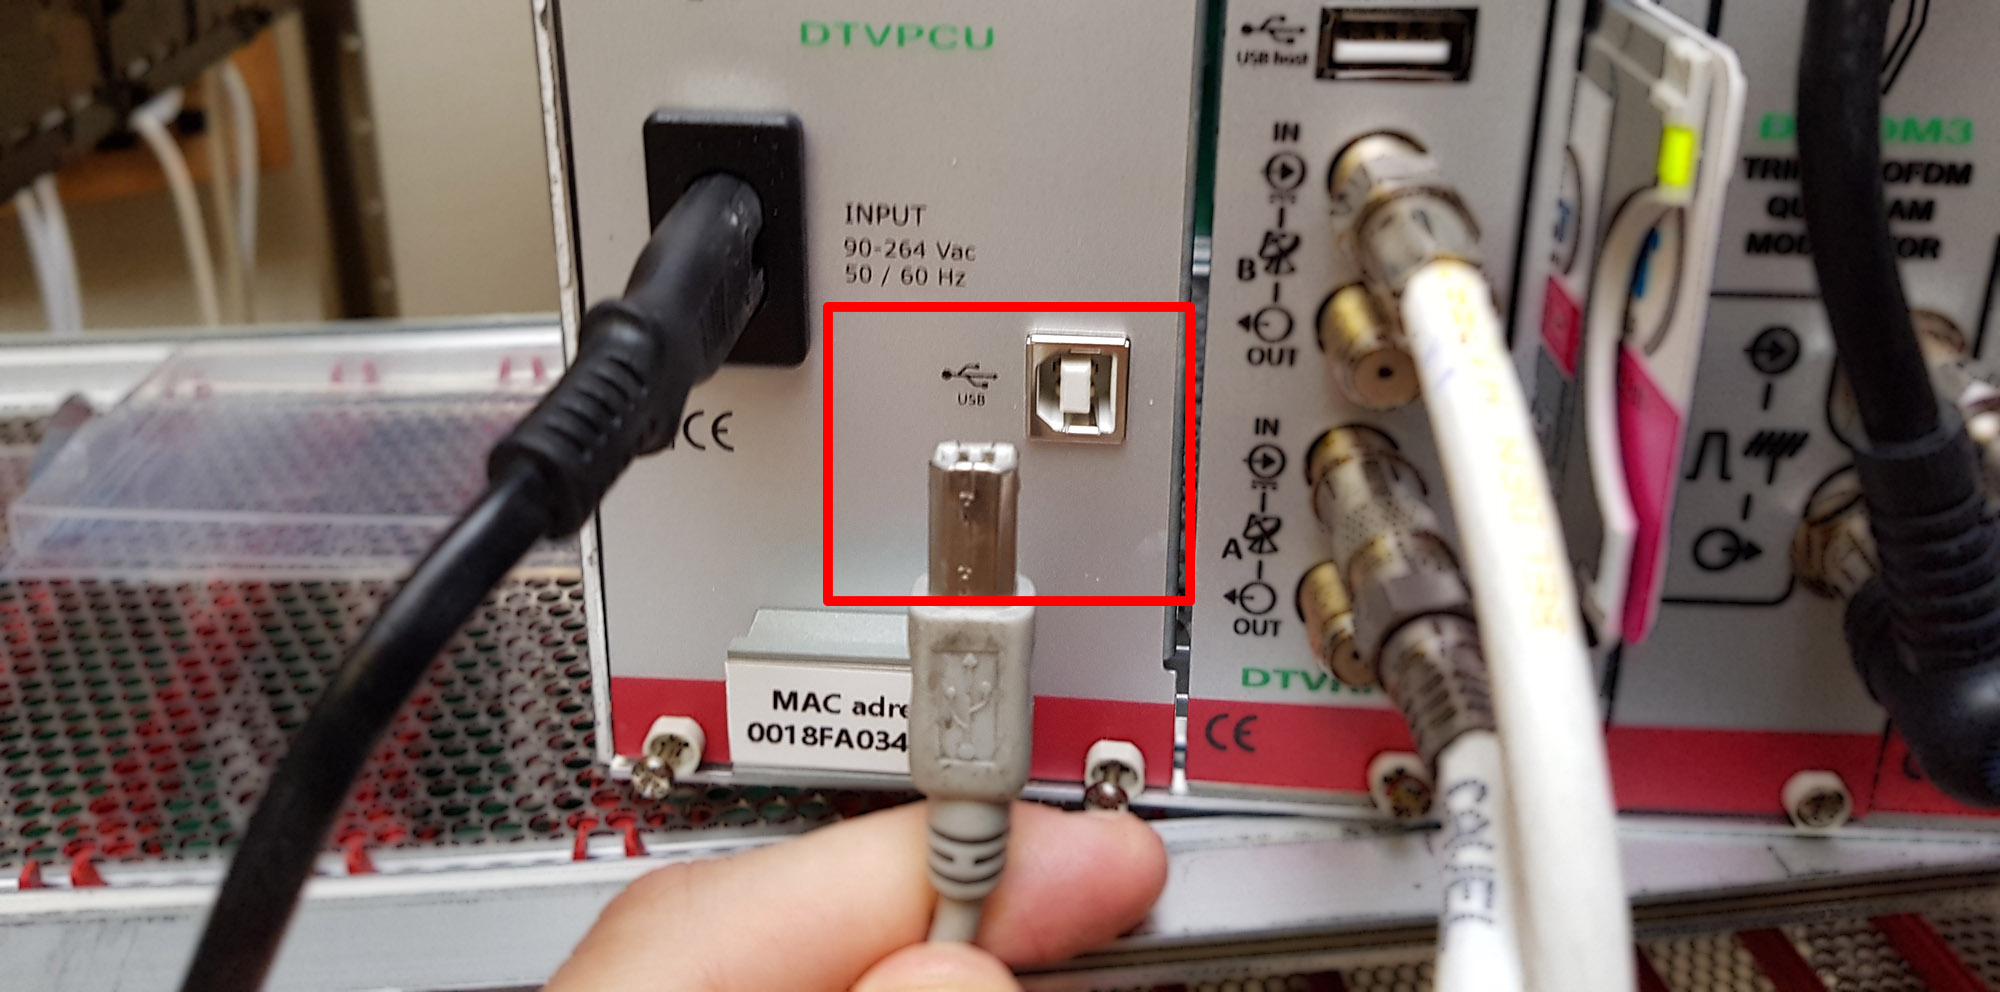
Step 2 : Connection
Connect the usb cable to the headend and to the usb port on your computer.
Make sure the headend is powered on.
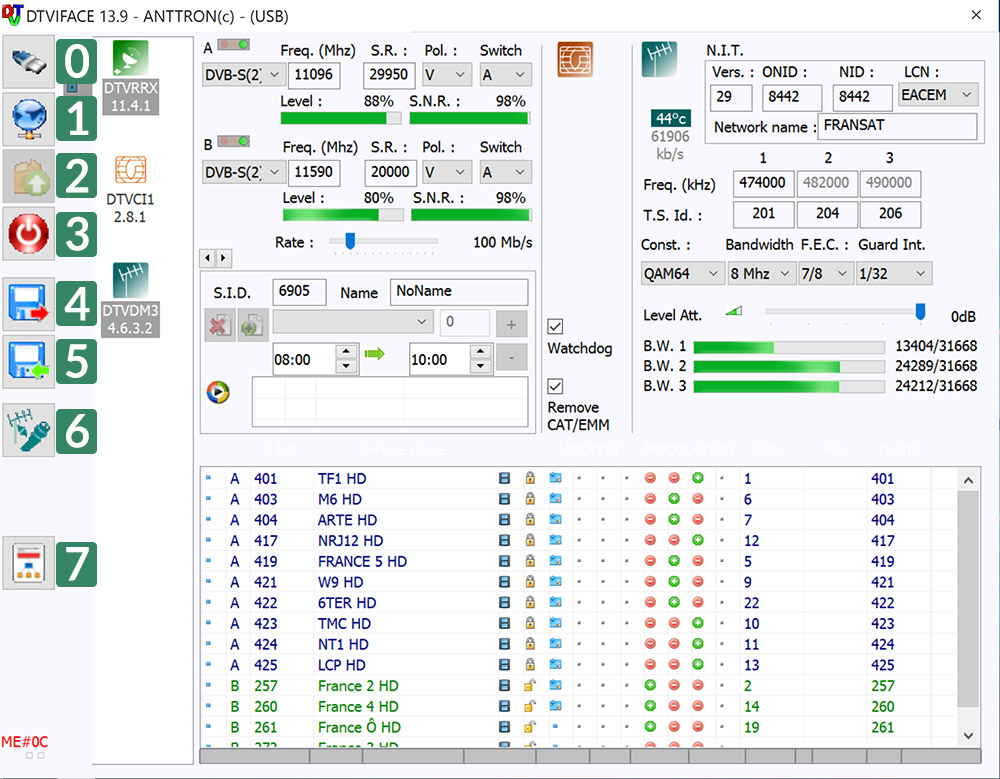
Start DTVIface on the computer and wait for the headend to connect. If no connection is made automatically, click the USB button on the upper-left in DTVIFace.
Step 3 : Ready to use!
Congratulations, you're ready to start configuring your headend.
Legend for the action buttons:
[0] : Manual connection trigger for the headend-usb-connection
[1] : Connect to your headend over internet (DTVIFace Remote license for your headend is required)
[2] : Firmware Upgrade: when button is active, a firmware upgrade for one of the modules is available and ready to install.
[3] : Restart your headend
[4] : Load a configuration from your hard disk
[5] : Save the actual configuration to your hard disk
[6] : Modulator conversion: when clicked the modulator changes the output signal type from DVB-T to DVB-C and vice versa
[7] : Generate an HTML-report of this headend